*This post contains affiliate links. I only recommend products I trust and would buy for myself.
I should probably start this post with a disclaimer. I am by no means a professional expert photographer.
I worked in a Sears Portrait Studio in college for 3 years, and thought, at the time, that I had it figured out. Ha! Not even close. Honestly, I'm still learning, and I'm sure no photographer is ever really finished improving their skills.
It can be so overwhelming trying to figure out how to create that "wow" factor, but truthfully, DIY/home decor blogs with great photography are blogs that find the most success. Plain and simple.

If you're a DIY/home decor blogger who isn't focusing on photography, you honestly should be. It is so incredibly vital. I know it can be scary at first, but I promise you, it's so much fun once you figure out the basics! I'm here to hold your hand every step of the way. (And maybe take you out for coffee and whisper to you, "you can do this", if you start getting down on yourself.)
Breathe. I've got your back.
1. Make an investment in a DSLR camera and lens.
Gee, Lauren, thanks for telling me my first step is to spend all kinds of money I don't have on a piece of equipment.
I know, but hear me out. (There are other budget-friendly tips too, I promise.) A DSLR camera doesn't have to cost you thousands of dollars. My husband bought my Canon 60D for me as a wedding gift. It was all I wanted in the world...besides him, of course.
If you're just starting out though, a smaller DSLR like a Canon Rebel is a great place to begin. Nikon is good too, but I personally choose Canon. You can even buy them used for half the price of retail (just know the risks of potentially not having a warranty). Put away a little at a time to save up. Or if your family normally buys you birthday presents, ask them to chip in for a camera instead.
You can find them for as low as $350, sometimes lower. And, in the end, it's actually an investment not just money down the drain. If you can become a successful blogger with the equipment necessary to make it a paying job, it will pay for itself time and time again. I have my eye on a Canon EOS 5D Mark III (it ain't cheap), so I'll probably be saving for a long time.
Start out with the kit lens (the one that comes with the camera body) until you get used to it. Then, graduate up to ones where you can really show off your newfound skills. I use a Tamron 17-50 mm F/2.8 and it is capable of pretty much all of my shots I want to take. There are lenses with better glass out there, but mine is great for someone in the intermediate level.
If you don't believe me on all of this DSLR preach, I'll show you what I mean.
Shot with my iPhone 5:
This is what my jewelry organizer from Monday's post looked like using my iPhone's camera. I haven't done anything to it editing-wise, but you can probably agree it's not the best picture. It's grainy and underexposed and just...meh.
DIY/home decor photography does best when it's clear, sharp, and bright, and it's simply not possible with my iPhone, no matter how many tricks I try. My bathroom has limited natural light, so it's a tricky spot.
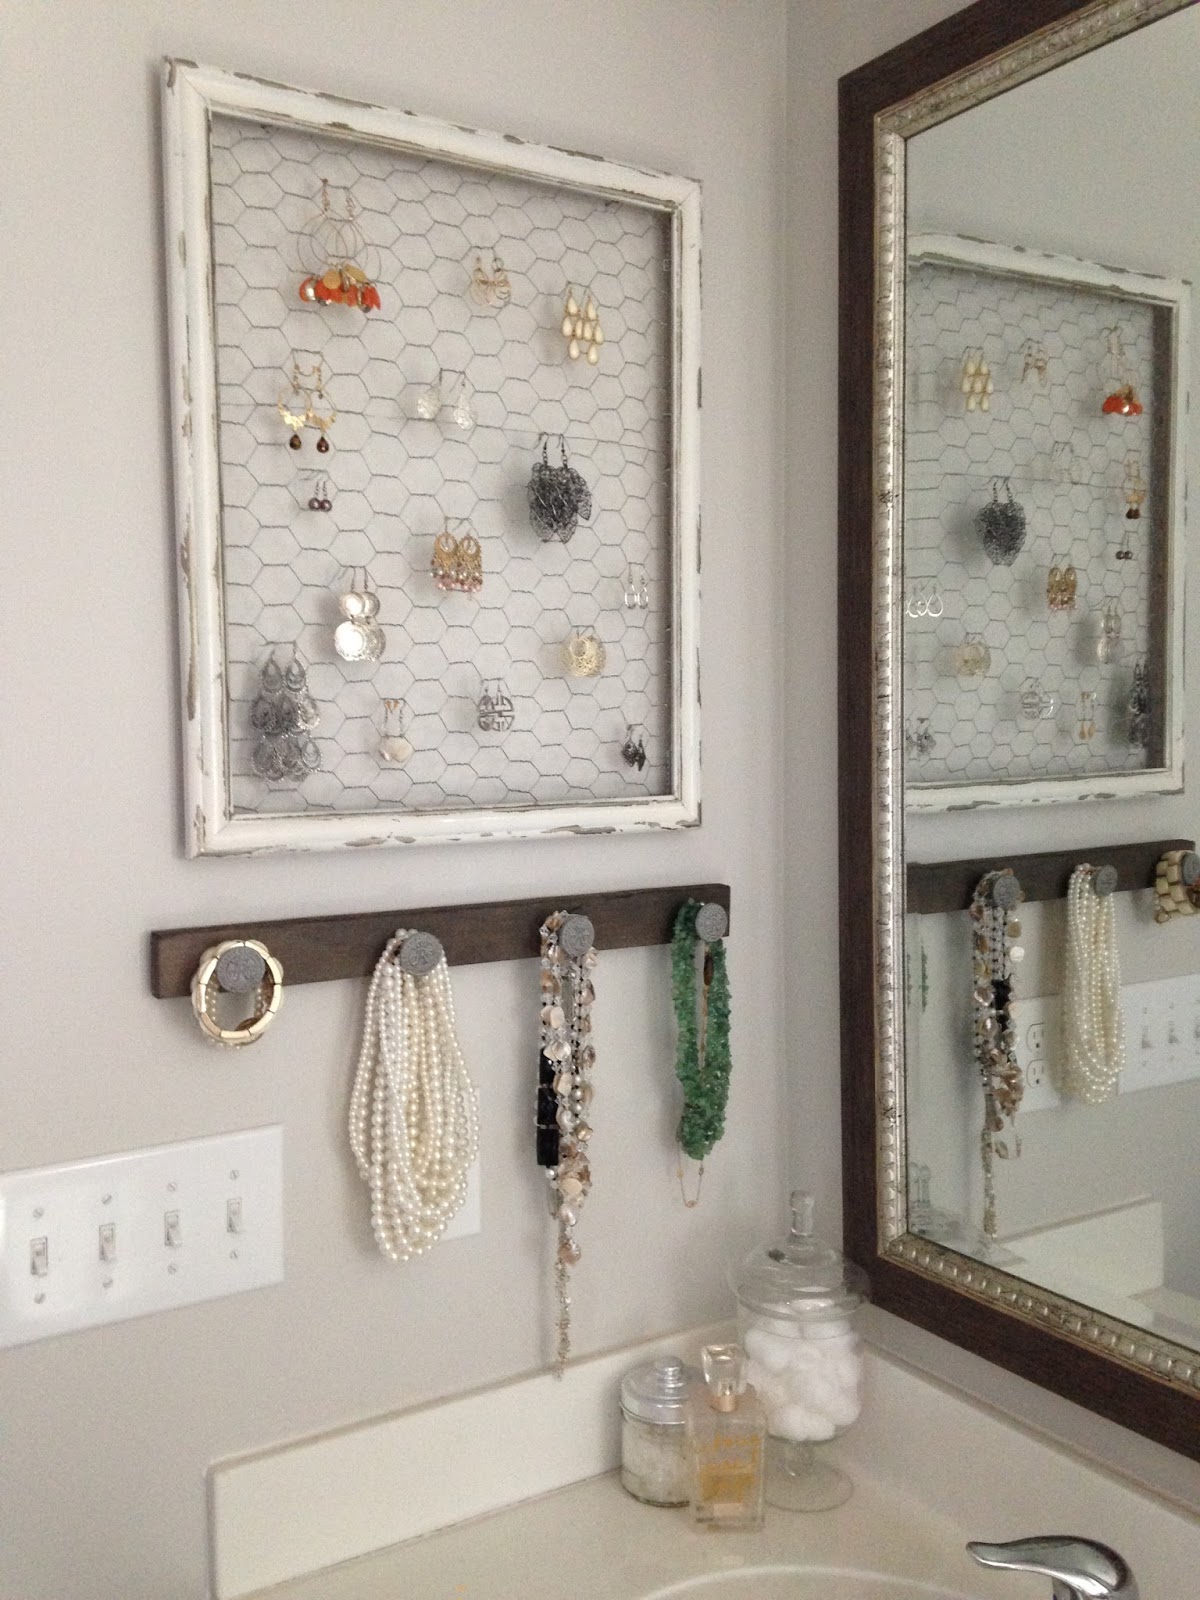
Shot with my DSLR and basic editing:
.jpg)
This, on the other hand, I shot using my DSLR. And I barely did any editing except sharpened it and bumped up the exposure just a small amount.
2. Learn manual mode.
Lauren, why are you throwing all this scary stuff at me?
Ohhh but trust me, manual is TONS of fun when you learn the very basics of it. I am not someone who can just sit down and read my camera manual. (And I was an English teacher for 5 years, so that's probably terrible of me to admit.) I will fall asleep, and I'll learn absolutely nothing. If you're only using your camera in automatic mode, you're missing out on a lot and not getting your money's worth.
This guy at Fro Knows Photo taught me a lot of tips in his videos in a way that I could actually understand. He's a quirky fellow, and he's good at explaining ways to learn your camera. (This isn't even an affiliate thing. He just really really helped me. But I'm always honest with y'all anyway.)
3. Use a tripod and shutter release remote.
These two things alone completely transformed my photography. If you don't believe me, take a look at this photo when I didn't have my tripod and shutter release remote yet. I shot this back in January of last year.

It's okay, but it's still underexposed and a bit fuzzy.
I used the exact same camera and the same lens several months later. The only difference was I used a tripod and shutter release remote. Here's what I ended up with:

SO much better! What makes a tripod and shutter release remote so great is you have a lot more control over your lighting. Without a tripod, you have to worry about camera shake and blurry photos and dark images in a room that has limited light.
With a tripod, you can bump your shutter speed way way down and snap a photo with the shutter remote. You eliminate camera shake, and your images come out super sharp consistently.
Remember that jewelry organizer shot from tip #1? Here's how little light I was working with.

But in the photos, it still looked like my room was brighter than reality.
.jpg)
Best $30 I ever spent. I use this tripod and this shutter release remote if you want one too.
Want to know my dirty little secret? See my headshot in the upper right on the sidebar of this blog? I DIYed it with just my tripod and shutter remote while my toddler was napping. There is no photographer behind that camera; just my finger on a button in my lap. :) No selfie stick here; I busted out the DSLR on that one.
4. Turn off all of the lights and utilize as much natural light as possible.
Back in February last year, I hadn't really figured out this trick yet. So I turned on all of the lights because, hey, photos need light. No. Instead, I would always end up with this yellowy hue in all of my photos. Like this:

Even though the hallway where this window hangs has no natural light, I still managed to figure out how to turn off all of the lights, open the windows on either end of the hallway, set my camera on a tripod, bump my shutter speed way down, and use my shutter remote to get this shot in an almost completely dark space. I snapped this for my Holiday Home Tour this past year:

For my jewelry organizer shots, this is how dark it was in the room. But the little bit of light coming from that window provided just what I needed without that yellowy color.

5. Focus on your framing.
You've probably already noticed, but do you see all of that mess on the counter while I was taking the jewelry organizer shots? Yep, that was there the entire photo shoot since I was in the middle of painting our bathroom cabinets.
And actually, pretty much all of my projects are that way. (Oh no! The illusion has been destroyed!)
Yesterday, I had to reshoot my faux planked bookcase for Reloved Magazine. This is what it looked like in my frame:
.jpg)
Here is what the room looked like behind me:
.jpg)
Yep, furniture moved around, toys thrown everywhere (trust me they're all over the sofa), and Curious George on the TV with an exploring little two year-old in the midst of it all.
Hey, I warned you, I'm always honest here.
Don't get too "artistic" with your framing. I find that my best, most viewed shots are ones where my project is front and center, no weird angles or complex framing.
6. Invest in editing software.
When I first started blogging, I used PicMonkey to edit my photos. But I wanted to take my photography to the next level, and it just wasn't possible without stepping up my game in my editing. All of the online editing programs I've used couldn't process RAW photos, and they usually ended up grainy with all kinds of white balance/lighting issues.
I got Adobe Lightroom 5 a couple of months ago, and I've been so happy. I was worried that I'd be totally lost in learning the program since I struggled with Photoshop in the past, but Lightroom was way easier. (You can find my Beginner's Guide to Lightroom here.)
Here is the difference.
Shot right out of camera (no editing):

Post editing using Adobe Lightroom:
.jpg)
Lightroom has been a better time saver from the online editing programs too because I can edit all of my photos for a post in one batch. What used to take me an hour or two in editing for a post, I now can accomplish in about 15 minutes.
7. Make your images "pinnable".
I know I was sort of hating on PicMonkey in tip #6, but I still do love it for adding text to my images. Pinterest is one of my top referrers to my blog because I make my images "pinnable".
The best way to make your images stand out on social media is to use a vertical image with text for the title of your post and your watermark. I probably do this on 90% of my posts. (Ahem...like I did at this top of this very post.)
And like this one:

I've heard great things about Canva from other bloggers too. You can also add text using Adobe Photoshop if you know how to use the software, but I'm apparently too technologically challenged with that one. Plus, Photoshop isn't as budget-friendly for me.
8. Practice practice practice!
Don't be so hard on yourself if improving your photography seems too challenging. Make it a goal to attempt one skill a week. Try photographing a project with only natural light, even if you just have a cell phone camera for now.
Play around with the settings on your camera and learn what works and what doesn't. Get to know it. And have fun with what images you can create. In the end, that's what it should be all about, having fun.
I'm still not a pro, but I'm always happy to help a fellow blogger whenever I can.
Whew! Man, this was a long post!
Did all of this info help you? Do you have any photography tips of your own? Do you want to see more posts like this? Please tell me in the comments!
Update: Check out Revolutionize Your Blog: Beginner's Guide to Lightroom!

Blessings,
Follow me on
Or find me on
Tidak ada komentar:
Posting Komentar