Tampilkan postingan dengan label Guest Post. Tampilkan semua postingan

Jumat, 13 Februari 2015

DIY Rustic Framed Map

Happy Friday, y'all!  I know I normally post my Friday Faves, but I'm so happy to introduce you guys my friend Erin.  She's one of those interior designers who I'm pretty sure if I walked into her house, I'd feel right at home.  Definitely check out her blog when you get a chance!

Well hi there! I'm Erin from Meadow Lake Road, a blog where you’ll find inspiring design ideas, tips for do-it-yourself projects, and even help with design dilemmas in your own home. You can also follow our journey as we turn our brand new house into a home with some cottage charm.
In addition to writing Meadow Lake Road, I also have my own interior design business and am a mom to 6-year-old triplets. Life is crazy, but in a fabulous sort of way!

Anyways, I wanted to share a decor project with you I recently completed that hangs in our house. My kids are constantly asking me about where things are located in the world, so I wanted to hang a world map in our home that we could refer to it anytime they had questions. I also wanted it to flow with the decor in the rest of our home and be somewhat kid-proof, so I made my own rustic frame to hold a world map we had lying around.

DIY RUSTIC FRAMED WORLD MAP

This is the hallway that leads to the kids' bedrooms and where I wanted the map to hang. As you can see, the long wall on the left had nothing on it and was begging for something large to adorn it.

hallway before art

So after picking up some inexpensive 4 inch wide pine boards at Lowes, I got to work creating my frame. First off, I cut pine boards to size using our miter saw, nailed them together with a nail gun, and gave the wood a coat of Minwax Dark Walnut stain.

dark walnut stained wood frame

After the stain had completely dried, I dry brushed white paint over the top. I wanted to use supplies we already had at home, so I used interior white latex paint, but you can also use acrylic paint for this.
To dry brush, spread paint thinly on a piece of cardboard. Then take a completely clean and dry paint brush and dab just the tips in the thin layer of paint. Don't saturate your brush in the paint! You want to keep it pretty dry.

dry brush technique

Spread the white paint thinly on your wood and try to make it go as far as you can. Get all of the paint off of the brush and onto the wood before you go back for more.

dry brushing wood with white paint

This is what it looked like when I was done dry brushing.

dry brushed wood frame

Once the paint has completely dried, go over it with a piece of sandpaper to make the paint look less uniform and more like old barn wood.

sanding white paint

I didn't want to use glass in the frame because I was worried about the kids breaking it and I wasn't keen on plexiglass either because I knew it would get scratched up (I could totally see my kids driving their Hot Wheels all over the map!). So I took my frame and my map to my local frame shop and they suggested that I have the map vacuum mounted on a piece of foam core and then have them apply print guard over the top.
Print guard is a protective layer bonded on top of the print that protects it from dirty little fingers, scratches, and sun damage. But the best part about it is that it's washable and unbreakable! This is the perfect solution for a piece of 'art' that's going to hang at kids' eye level.
Since the foam core is so lightweight, I just had the frame shop use their heavy-duty tape and attach the map to the back of my frame.

print mounted to frame with tape

After attaching d-rings to the back, I hung it up on the wall.
The picture on the left below is what the kids' hallway looked like before and the right shows how the newly framed map looks on the wall.hallway before and after
I am so happy with how it turned out! It blends in with the rest of our house perfectly and the kids love looking at it. I added a tiny black X to the map to show them where we live (Snohomish, WA) so that they don't have to ask me repeatedly.

framed world map in hallway

hallway with framed map

Thank you so much, Lauren, for allowing me to guest post on your lovely blog! Lauren and I 'met' in the blogosphere a few months ago and I am thrilled to have met a blog buddy that I have so much in common with. And it's such an honor to get to share one of my projects with you all!

If you'd like to see more of my DIY projects and our home, are curious about the wall color in our hallway, or are looking for some design tips, be sure to pop on over to Meadow Lake Road. You can also follow along via Pinterest, Instagram, and Facebook.
blog signature

Rabu, 11 Februari 2015

Thrift End Table to Farmhouse Coffee Table Makeover

I'm so glad to be sharing Karen with y'all today for surprise guest blogger day #3!  I "met" Karen while doing our Holiday Home Tour, and I've been loving her style ever since.  I hope you enjoy her project today!


image
Hi y'all! I'm Karen from Karen's Up on The Hill and I am just tickled to be guest posting for Lauren on her amazing blog! She is just so darn sweet and creative, and I am so honored that she asked me to be here!

If you haven't been by my place before, we currently have a home that was built in the 50's in the semi-rural western suburbs of Philadelphia, "Horse Country" if you will. We are new to this area and when we moved in and I started to decorate, the house took on a bit of a farmhouse style of it's own.
So, today I'm sharing how I transformed a $30 thrift store end table into a farmhouse style coffee table for our living room.

image

I had been looking for a coffee table for this room since we moved in last year, with no luck. First of all, have you seen the prices on coffee tables lately? They are a small investment for sure, and I change my mind...a lot. Even if I wanted to spend that kind of money, I couldn't find one with the look, price or size that I wanted. So I decide to make my own.

First, I found this over sized, really heavy end table at a local thrift store. I have been stopping by there for months and I finally got lucky. It was beat up and ugly (ugly like an old library table) but I saw the potential, and it was only $30, so if it didn't work out, c' est la vie, it was no great loss.

image

I hauled it home, and my husband cut 5 inches off the legs for me to make it the standard coffee table height of 18 inches. Then I gave it a few coats of MMS Milk Paint in Ironstone. I let the paint dry and do what it wanted to do, and then lightly sanded where it had chipped and crackled. To finish it up I applied a coat of clear wax.

PicMonkey Collage paint

I'm really pleased with the way it came out. Our home is super casual and this room is about as fancy as we get, so I just styled it with a few simple touches to keep it light and bright.

PicMonkey Collage good

image

image

Thanks so much for letting me share my living room and my little re-loved $30 coffee table with you today here on Bless'er House.

Have a great week and feel free to stop by anytime and say hello!

Karen

Selasa, 10 Februari 2015

DIY Bohemian Chic Triangle Mobile

It's surprise guest blogger day #2!  I'm so thrilled to have Erica here today sharing her beautiful talents. Give her a warm welcome!

triangle mobile

Hello, my name is Erica and I blog over at Dwell Beautiful! Dwell Beautiful is all about finding beautiful solutions for everyday living - from craft tutorials and DIYs, to how to get high-end looks for less and home owner advice. I specialize in tutorials and home makeovers for those on a budget!

A HUGE thank you to Lauren for having me along for a guest post today! It's all about the details when it comes to making a home truly feel like your own. You can have all your furniture in place, but without the personal details and decor items, your home can just feel like another cookie-cutter house. I love to do things on a budget, so when it comes to adding personal touches, I like to make my own!

So today I'm bringing you a tutorial for a fun DIY triangle mobile, which would be perfect for a nursery or a whimsical piece of decor for any room in your home! This is an easy, but a little bit time-consuming project and is great for when you're in bed sick or want to binge-watch a TV show on Netflix (for me, it was Scrubs)!

Triangle Mobile Materials


triangle mobile

- Scrapbook or other decorative paper
 - Embroidery hoop (mine was 9" in diameter)
 - Paper cutter
 - Scissors
 - String
 - Glue stick (not pictured)
 - Tape (not pictured)

Step 1

triangle mobile

Pick out several pieces of scrapbook or decorative paper that you will use for your project. Try to choose pieces that have a similar color scheme to keep your finished mobile looking cohesive! I decided to go with blacks, blues and pinks, with a little bit of yellow thrown in!

Step 2

triangle mobile

Take your paper cutter and cut all your scrapbook paper pieces into equal strips. My strips were 0.75" inches in width. Basically I just line up my paper to the edge where the metal meets the white plastic on my particular paper cutter and just went with that width. Once you're done you'll have a beautiful pile of strips like so:

  triangle mobile

Step 3

triangle mobile

Take those strips that you cut in the previous step and cut them again so they are roughly perfect squares. Again, I just eyeballed this for measurements, but feel free to measure it out if you want it to be perfect!

Step 4

triangle mobile

More cutting! Woohoo! Take all those squares you just cut and then cut them in half on the diagonal so that you get two triangles. All this cutting is a little time-consuming, but it's definitely easy!

Step 5

triangle mobile

Take your string and cut a bunch of different lengths - don't feel like you have to measure anything! Just cut some short ones, some long ones, and some medium ones. I think I cut around 18 strings total. Then take your glue stick and start gluing two triangles together, with the string running through the middle. That way, no matter which way the mobile turns, all the triangles will be double-sided and look professionally finished! It's okay if the triangles don't line up perfectly, I think it just ads to the charm!

Step 6

triangle mobile

Once you've finished gluing your triangles over the string, attach the strings to the inner ring of your embroidery hoop and tape them in place. I would suggest using clear tape for this so it's less visible, but all I had on hand was colored washi tape! You could also use little dots of hot glue, if that works better for you. After you've attached all the strings, tie a couple of hanging strings to the edges of the hoop so it'll be able to hang freely! Put the outer ring of your embroidery hoop back on and tighten the screw. And you're all finished! Here's what my finished triangle mobile looks like:

  triangle mobile

 I'm so pleased with how it turned out! I decided to hang it in my recently finished master closet makeover where I think it fits in so perfectly with my gold 'S' and my colorful art cards!

  triangle mobile

I love how the gold string adds a little bit of glimmer! I can totally picture a baby watching this for hours! Also, a word of warning - if you have cats, make sure it's hung up high. My cats thought this was the most awesome toy in the world and were attempting to launch themselves at it only moments after hanging it up! A word to the wise ;)
  triangle mobile

triangle mobile

triangle mobile

triangle mobile  

 This triangle mobile is a great piece of modern/bohemian/rustic decor and would work in a lot of different places and different decor styles. Simply switch up the paper, or spray paint the embroidery hoop for a totally different look! This piece can absolutely be customized in a number of unique ways.

 Thank you SO much again to Lauren for having me over at Bless'er House today and I hope you enjoyed the tutorial! I'd love for you to come visit me at Dwell Beautiful to see what's new, like my geometric fox art and lazy susan makeover.

triangle mobile

Have a fab week and a happy Valentine's Day, everyone! DBSignOff


Senin, 09 Februari 2015

Brightened Up Basement Stairway Reveal

Happy Monday, y'all!  As I told you guys the other day, I am taking the week off to enjoy a little time with family, knock out those last nagging projects on our bathroom makeover, and take a relaxing breather.  Be sure to follow all of my bathroom progress on Instagram to get a few sneak peeks!  

I'm so excited to have four amazing ladies sharing their projects with you this week!  And I'm kicking it all off with my blogging bestie, Heather.  Her makeovers will leave you speechless as she has been published in This Old House and USA Today Home Magazine, and her humor will leave you rolling in the floor with laughter.  I hope you love her makeover reveal today as much as I do.

~Lauren

Painted Stripe Stairway Runner | Brightened Up Basement Stairway Makeover


I am thrilled to be hanging out with you all at Bless'er House today.  I often call Lauren my blogging BFF.  She's one of those people in this big blogging world that you meet, and right off the bat, you know she's the real deal.  Genuine, talented, and sweet as Georgia tea on a summer's day.

I'm Heather.  My husband Dave and I's site is The Heathered Nest.  We're new to the blog scene, but old-timers when it comes to DIY and home renovation.  Last year, we moved out of our urban comfort zone, and moved into, I'd have to say, a bit of a country twilight zone.  We bought a home on a little land...a place where the kids could run, frolic, and enjoy the wonders of the great-out-of-doors.  Problem was that the in-of-doors was a tad of an ugly-80's nightmare.

This was kinda ok, because I do love me some 80's.  If I had to have picked a theme song for our pad it was probably that Golden Earring song...you know, "Help, I'm steppin' into the twilight zone..."  Or possibly Guns n Roses' mega hit "Welcome to the jungle"...


You don't get more classic 80's hair metal than that one, right?!  To prove this home's 80s-ness, check out this totally gnarly, gag-me-to-the-max bathroom we had.  Seriously.  And if you're still not convinced of this time warp we were dealing with...check out the shower curtain we inherited when we bought "The Twilight Home".


DO YOU SEE THAT???  Our inherited bathroom curtain MATCHES Axl Rose's outfit!!!  I moved into the 1980's...drop the mic.

Here was our 1980's smurf-er-ific stairwell that led into the 1980's basement (side note: that smurfy blue color follows us everywhere...check out THIS room we remodeled!).


 I know...


In the words of that aforementioned 80's icon Axl Rose, this place was gonna bring us to our "sha na na na na na knees, knees" 


So, we got to work.  Oh, that's us...in our normal weekend leisure garb.  Wish I was kidding.


Our first thought for the stairwell was that we would stain it to match the hardwoods in the rest of the house.  The treads on these steps are pine.  Pine isn't the easiest to stain.  We gave it the ol' college try...you can see the result on a couple stairs in the picture above.  Not good.  Our buddy Axl Rose probably would have said "All we need is just a little patience".  Well, he's a very sage and wise fellow.  And I wish that we were better with the whole "patience" skill.  But we're not.  So we moved on to plan B.  


Plan B was paint.  Paint and utility grade unfinished oak hardwood flooring for the landing (which costs $1/sq ft..AMAZING, right?!?!).   Above is our work crew.  And yes, that's their weekend garb.  Pajamas.  Listen, there's a reason I don't write a fashion and/or a parenting blog. 

Painted Stripe Stairway Runner | Brightened Up Basement Stairway Makeover

Painting this stripe design was a bit time consuming, and we learned a couple tricks along the way.  More about that soon on the blog.

Painted Stripe Stairway Runner | Brightened Up Basement Stairway Makeover

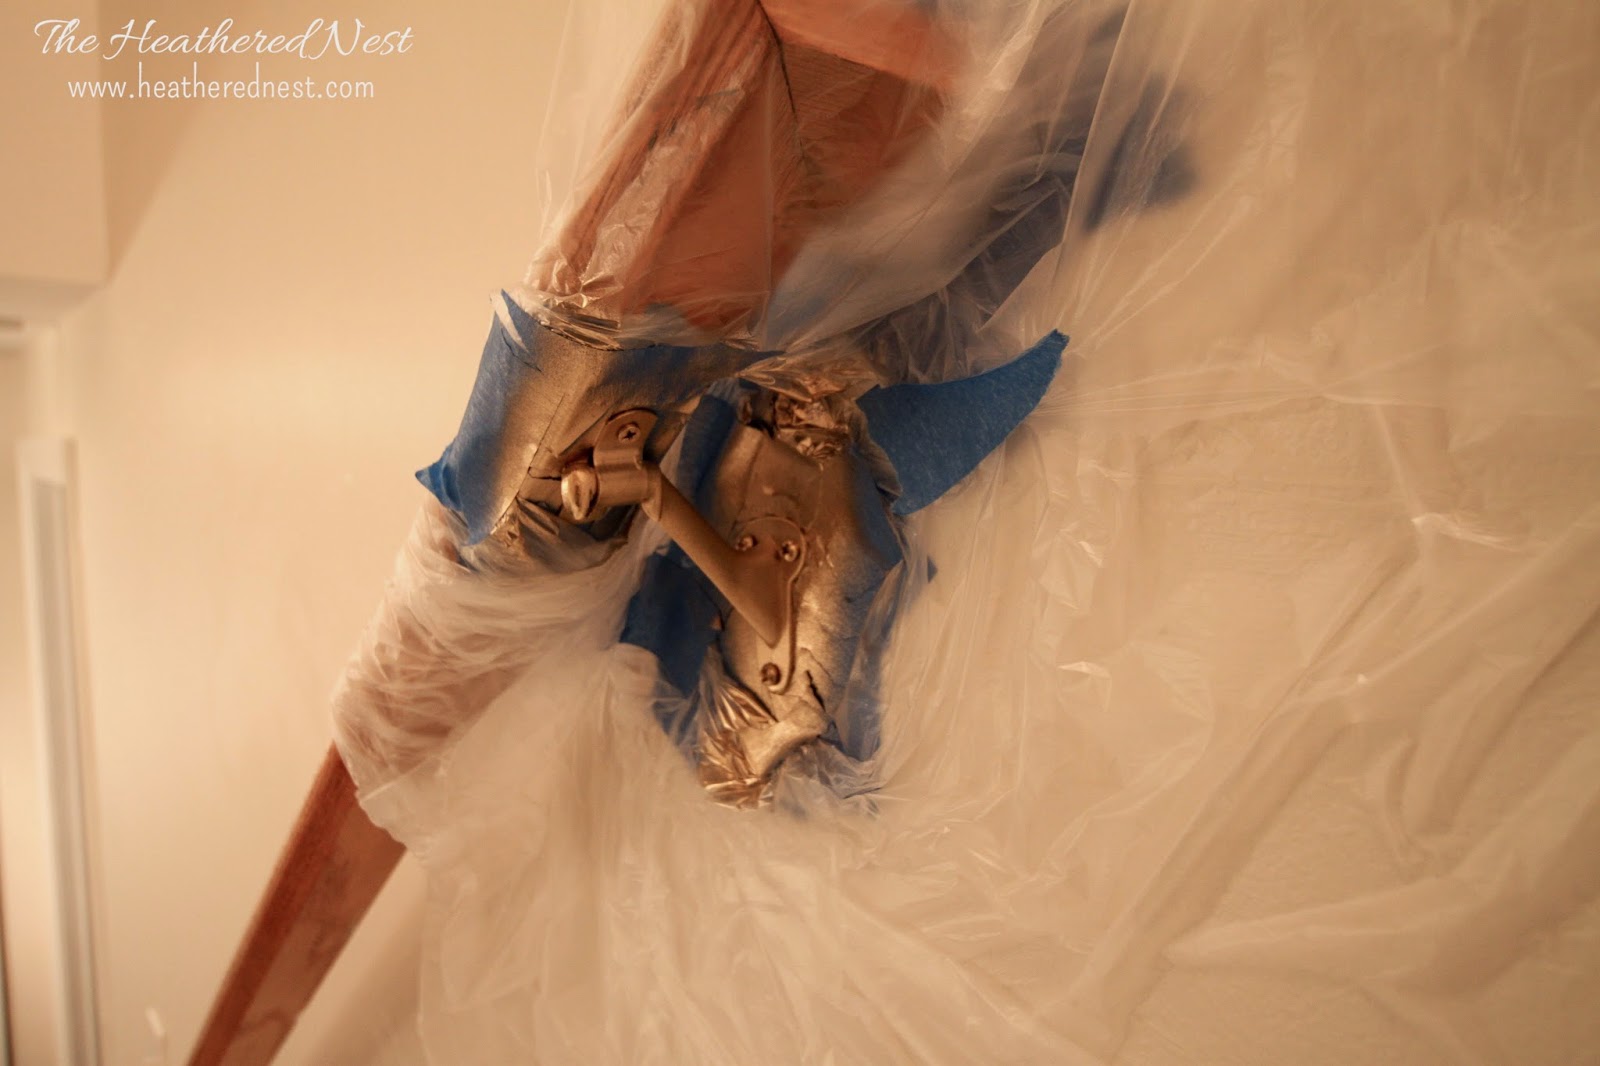
To save costs and time, we kept the existing handrails and updated them.  We spray-painted the hardware, and painted the banisters to match the stair treads.  SOOO much cheaper and easier than buying, staining, and installing new ones. 

Painted Stripe Stairway Runner | Brightened Up Basement Stairway Makeover

And voila, no more 80's-ugly!  We removed an old builder-grade vanity mirror from that bathroom in the first picture, cut it, and framed it out in some barnboard.  We love barnboard here at the Heathered Nest.  If you click those links, you'll see some examples of what we've done with it.

And that light fixture?  Guess how much that cost...ZERO!  It used to be one of those old builder-grade-boob-lights (yes, that's a real term, didn't make it up).  Here's a pic of the light before...

Painted Stripe Stairway Runner | Brightened Up Basement Stairway Makeover

We just spruced it up with some capiz shells and again, the almighty spray paint.  Now, I think she's a "total babe" as they said circa 1988.

Painted Stripe Stairway Runner | Brightened Up Basement Stairway Makeover

To me, the white handrail with gold hardware feels clean and bright, which are helpful in a darker basement.

Painted Stripe Stairway Runner | Brightened Up Basement Stairway Makeover

Once upon a time, there were walls flanking both sides of this stairwell, floor to ceiling.  We knocked one side down to open up the space and make it feel less like entering a dungeon.

Painted Stripe Stairway Runner | Brightened Up Basement Stairway Makeover

We've done a lot of stairwells in our time.  Funny thing is, this is one of the cheapest we've ever done, and despite the low price tag, the finished product is easily one of my favorites.

Hope you like the results!  And so glad to have "met" you all over here at Bless'er House.  Anytime you're in my neck of the web, feel free to stop on in and say "hi".  We love visitors out here in the country.  And if you, too, love the 1980's you'll be coming to the right place.  It's just now, we keep our 80's blastin' on the ol' boom-box rather than staring at it all over our walls.  The 80's is definitely a decade that is much better heard, but NOT seen.

Thanks for stopping by.  You can also...
Check us out on Pinterest: Heathered Nest
On the ol' Facebook Page

Tweet Tweet on Twitter

Head over to Hometalk